Combat Targets
Targets are collected and transfered across the system for different purposes. Here are a few scenarios:
- During Melee Attacks, when Motion Warping is used or during the Melee Scan.
- When Projectiles are launched and must hit a specific target.
- Area of Effect abilities that will collect multiple targets.
- Locking on and navigating targets.
There are a few elements that participate in the Combat Target Framework, so let's go through all of them and see how they are using and can interact with other parts of the system.
Summary: Combat Targets
- The Combat Target Framework heavily utilizes the Gameplay Targeting System
- Combat Targets are stored and broadcast by
NinjaCombatTargetManagerComponent. - Targets are acquired (and eventually dismissed) by
CombatAbility_TargetLock. - Targets are represented by
NinjaCombatTargetLockActor, applied and removed by the Target Manager. There are specific requirements for the Target Lock Actor to attach to targets. Make sure to check them! - The Target Lock Ability can be activated via player input or triggered, with a set target, via Gameplay Event.
Targeting Presets
Even though some abilities will provide simpler alternatives to collecting targets, usually the most common way to do so is using the Gameplay Targeting System.
Targeting Presets (UTargetingPreset) are the Data Asset used by the Targeting System to collect, filter
and sort targets. They are declarative ways to configure scans, which is very designer-friendly.
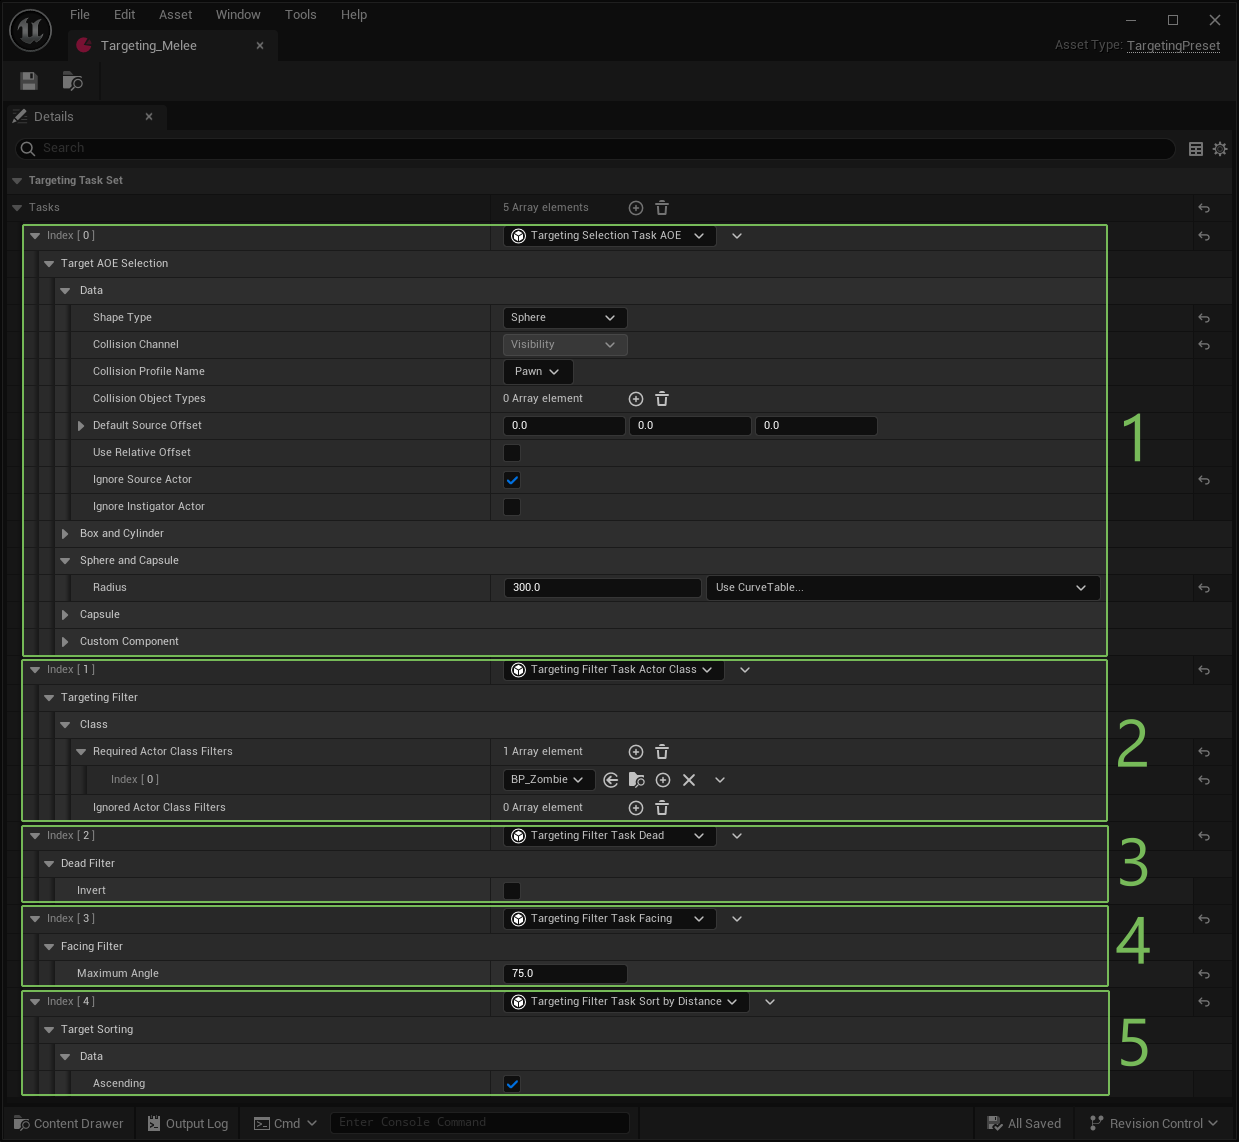
Let's check an example of how to configure this preset.

-
Target Selection: This determines how targets will be selected. It uses shapes to delineate an area of effect and then performs a scan on the configured channel/profile to collect actors.
-
Filter by Class: This filter includes or removes certain class types from the initial target selection. You can use multiple filters to fine-tune your resulting group of actors.
-
Filter by Alive/Dead Status: This filter is provided by the Combat Framework and will filter out actors that are dead, as per the
IsDeadfunction from theUNinjaCombatManagerComponent. You can optionally invert this test, to exclude alive targets. -
Filter by Facing Angle: This filter is provided by the Combat Framework and will filter out actors that are not facing an angle that is lesser or equal than the maximum angle provided.
-
Sort by Distance: You can prioritize targets by sorting them by a criteria. In this case, they are sorted by their distance from the owner. Alternativelly, you can determine if this sorting should be ascending or descending.
Make sure to check available tasks
Make sure to familiarize yourself with the collection/filtering/sorting tasks available, both in the core Gameplay Targeting System and in the Ninja Combat plugin. Also, check the official documentation to understand how to debug the target acquisition as that may prove very useful.
Target Lock Ability
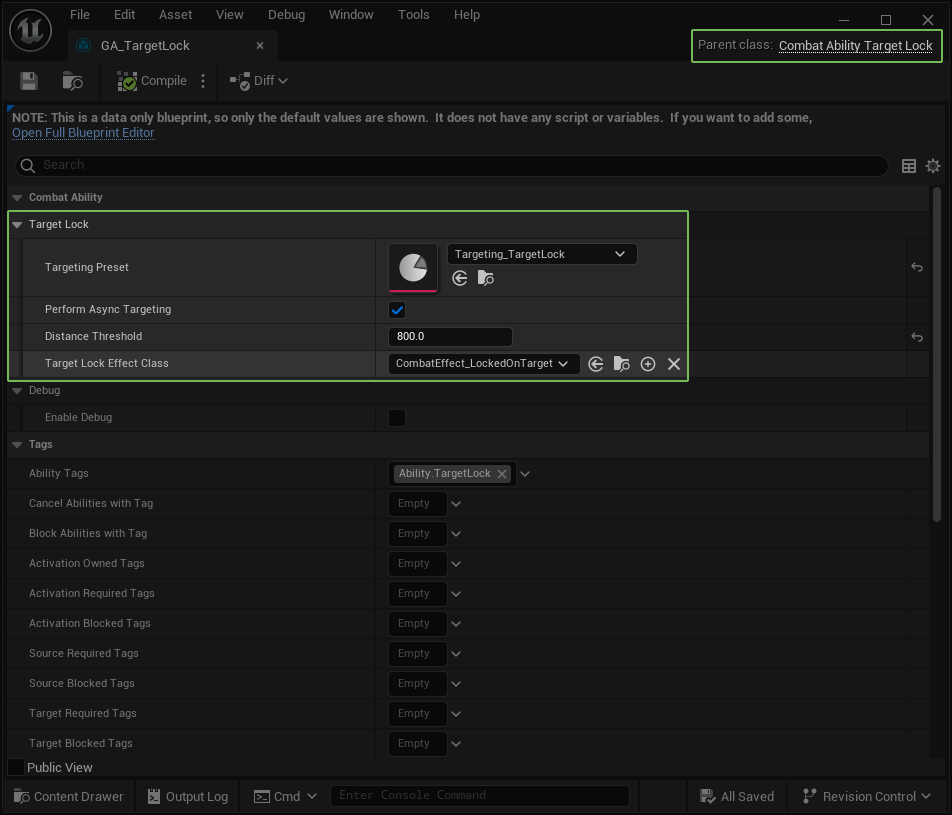
This Gameplay Ability is the System's main way to collect targets from Player Input. You can extend from CombatAbility_TargetLock
and configure your Blueprint as needed.

| Property | Description |
|---|---|
TargetingPreset |
The Targeting preset used to gather filter and sort targets. The first result is selected. |
PerformAsyncTargeting |
Determines if targeting should happen asynchronouusly. |
DistanceThreshold |
Distance limit, from the selected target, before the avatar disengages. |
TargetLockEffectClass |
A Gameplay Effect that informs that the avatar is locked to a target. |
Target Manager Component
This component receives the selected target as well and replicates it to all relevant clients. When the replication
happens, the new target is broadcasted to all subscribers to the component's CombatTargetChanged Multicast Delegate.
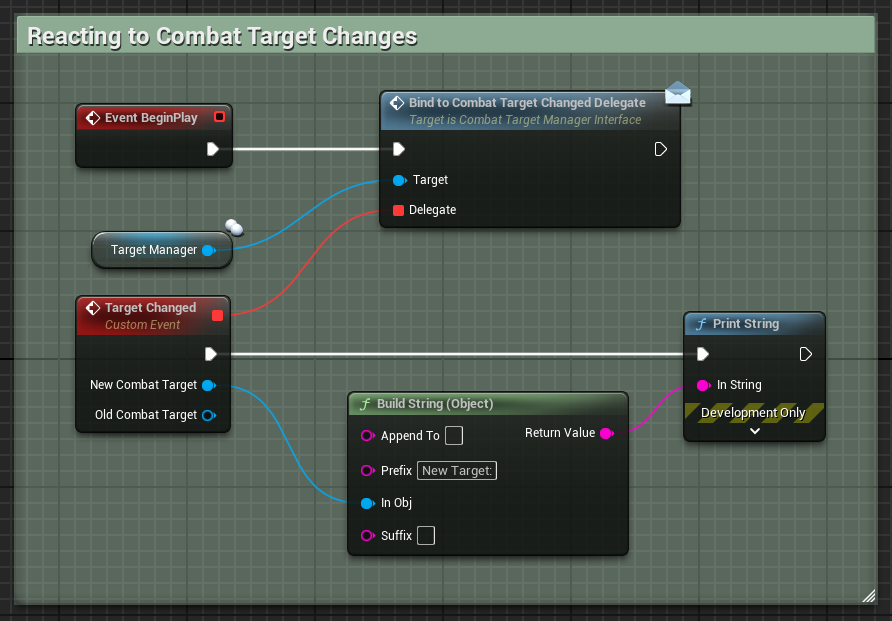
You can bind to this delegate via Blueprints or C++ (via the appropriate ICombatTargetManagerInterface).
Leveraging the Target Broadcast
Binding to the Target Broadcast is a good way to react to new targets in other systems such as Animation, Locomotion or Camera managers. By doing so you can do things such as setting an Aim Offset/IK Look At, set the movement to a "strafing mode" or setting a Camera Focus target.
Make sure to use the Interface!
In Blueprints, make sure to use the Interface Message node (check the little envelope in the Blueprint Node).
In C++, make sure to bind to the delegate using the ICombatTargetManagerInterface.

FCombatTargetChangedDelegate TargetChangedDelegate;
TargetChangedDelegate.BindDynamic(this, &ThisClass::HandleCombatTargetChanged);
ICombatTargetManagerInterface::Execute_BindToCombatTargetChangedDelegate(TargetComponent, TargetChangedDelegate);
The Target Manager also offers another important functionality that might be useful if you want Actors being notified
when they are targeted by other actors. These are actually defined by the CombatTargetManagerInterface and implemented
by the default Target Manager.
You can implement the following functions either in Blueprint or C++, as needed:
ReceiveTargetingSource: Notifies a target when it's being targeted by another actor. The actor is provided as input.ClearTargetingSource: Notifies a target when it's not being targeted anymore. The actor is provided as input.
Target Lock Actor
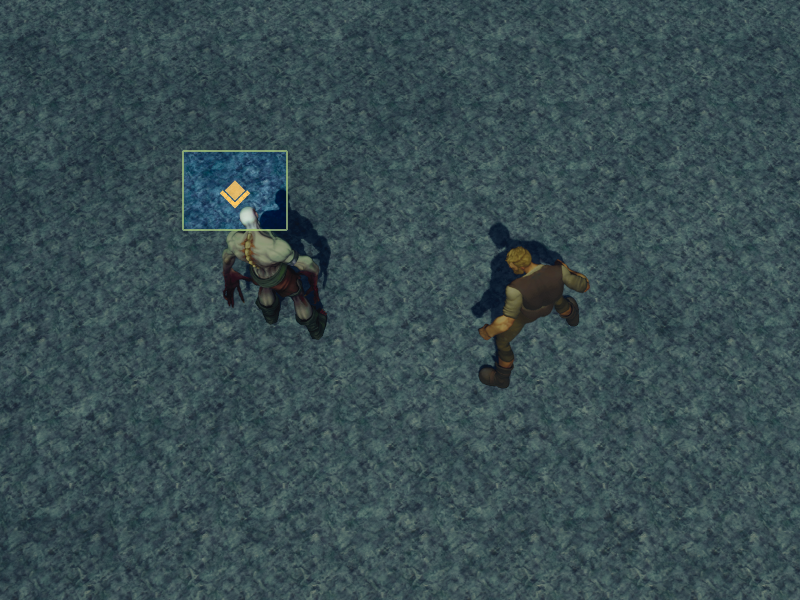
When a target is selected and replicated by the Target Manager Component, an instance of the Target Lock Actor is attached to the selected target, on the Local Player.
By default this component only has a Widget Component that can be used to render widgets showing the current target, like the example below, where a special widget was set to the actor.

You can extend this component further to perform other tasks that will represent the current target. You can also override the following functions to modify the actual actor being targetted, and then reverting this changes once it's cleared.
HandleTargetSet: Triggered when the target is set. Provides the current actor being targetted.HandleTargetCleared: Triggered when the target is cleared. Provides the previous target.
To properly attach the Actor to the Target, make sure to fill the following properties:
TargetMeshTag: A Component Tag used to find the Mesh Component to attach the actor.TargetSocketName: A Socket Name on the Target Mesh, used to attach the actor.
Target Lock Actor extensibility
This actor was designed to be very extensible, not only in how it's displayed and affects the current target, but
also in the way it's attached and detached. If you want to modify that strategy, you can override the AttachToTarget
and DetachFromTarget functions, either in Blueprints or C++.
Gameplay Events
You may want to force targets in your game. Maybe forcing a player to be already focused on something or an AI agent to have a target. You can do that by activating the Ability via a Gameplay Event Trigger.
To Activate the Target Lock Ability via a Gameplay Event Trigger, send a Gameplay Event to the Ability System,
using the Combat.Event.Target.Acquired Gameplay Tag, providing the desired target as the first OptionalObject.
Here's an example, setting the combat target to be the same as the Perception Target obtained by an AI Agent.
UAbilitySystemComponent* BotAbilities = UAbilitySystemGlobals::GetAbilitySystemComponentFromActor(GetPawn());
if (IsValid(BotAbilities))
{
    FGameplayEventData Payload;
    Payload.EventTag = Tag_Combat_Event_Target_Acquired;
    Payload.Instigator = this;
    Payload.OptionalObject = NewPerceptionTarget;
    BotAbilities->HandleGameplayEvent(Tag_Combat_Event_Target_Acquired, &Payload);
}
Gameplay Events are not exposed to Blueprints
Right now, the Ability System Component does not expose the HandleGameplayEvent function to Blueprints,
so there's no direct Blueprint equivalent to the C++ code above.
Similarly you can send a Gameplay Event using the Event Tag Combat.Event.Target.Dismissed to unlock the target
and end the Target Lock's ability execution.