Input Buffer
Added in version 2.0, the Input Buffer allows deffering execution of Handlers to a later moment.
This is usually desirable on some combat systems for example, when players may hit certain keys while animations are playing and cannot be interrupted, but the game should still react to such inputs to promote responsive experiences.
Input Buffer Design
The buffer is implemented using the Command design pattern as a conceptual foundation: Inputs that cannot be handled right away are encapsulated in a Command structure so they can be executed later on, when the buffer is closed.
Also, the Input Buffer is Animation Based, meaning that it will be opened and closed during certain points in an animation, established through an Animation Notify State.
Even though the Input Manager Component is responsible for managing the buffer by default, the
Input Buffer functionality is defined by the InputBufferInterface and any components that
implement this interface can be engaged by the animation, as long as they are enabled. The
Manager Component itself can be disabled as a buffer, if you want to replace it with your own
Buffer Component. This makes the Input Buffer system quite flexible.
Buffer, not Queue
The default Input Buffer provided by the system is exactly that, a Buffer and not a Queue. Difference being that, only one command will be executed later, when the buffer is closed.
Using the Buffer
To buffer any actions, the following steps are required:
- Mark any Input Handlers so they can be buffered;
- Add the Notify State to an animation that supports buffering inputs.
Allowing Input Handlers to be added to the Input Buffer
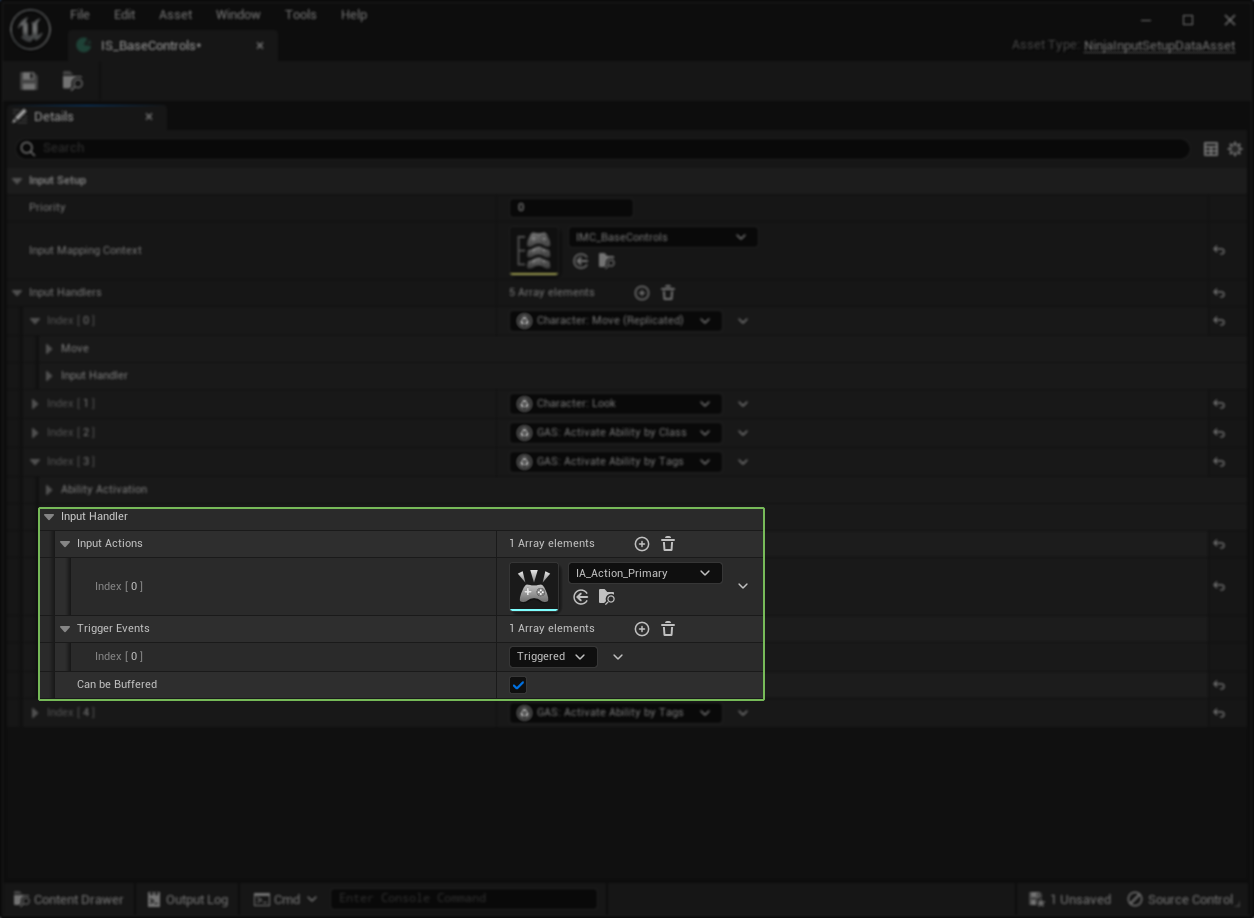
To add an Input Handler to the Buffer, you simply need to enable its Can Be Buffered
property, when registering the Input Handler to a UNinjaInputSetupDataAsset.

You are buffering Input Actions
Please note that, even though you are marking Input Handlers as "bufferable", conceptually it's the Input Action that gets buffered by the Input Manager Component!
This means that the Input Manager Component will collect all bufferable handlers that would be activated from an Input Action, while the buffer is active, and then invoke them later on, when the buffer is closed.
You can make Handlers bufferable by default
Even though this system was designed to allow the decision of buffering Handlers or not to
be made on a design level, through the Setup Data Asset, you can still set the default
value of that property to true in sub-classes/Blueprints.
Opening and Closing the Input Buffer from Animations
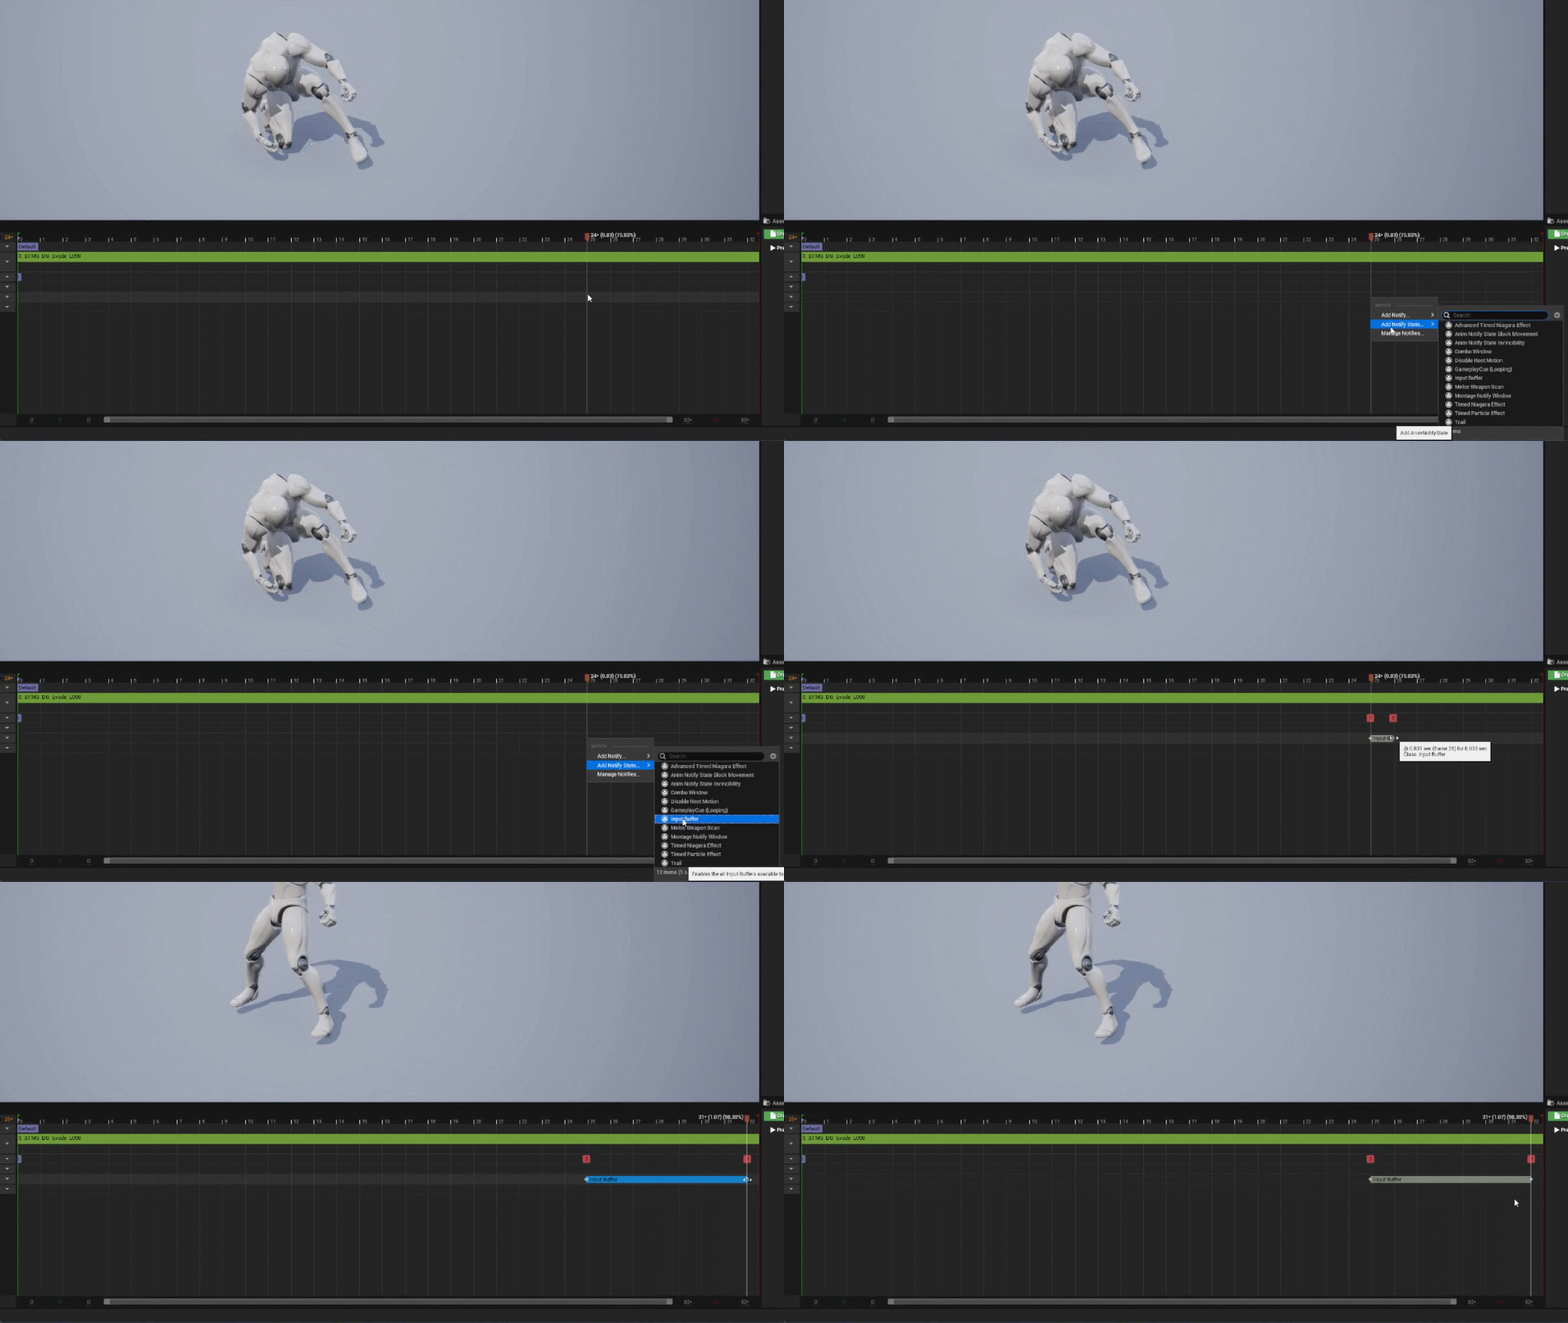
The most straightforward way to open and close the Input Buffer is by using the provided Animation Notify State, aptly named "Input Buffer".

Press SHIFT to scrub through the animation
While positioning Animation Notifies or Notify States, press and hold the SHIFT key to smooth the scrolling and previewng the animation at the same time.
Once the Notify State is placed, the following will occur:
-
Once the state Begins, the Input Buffer will open and the Input Manager Component will stop routing Input Actions to Handlers. Instead, it will save any Handlers that would be triggered, along with all their current Input Action Values, based on the buffering policy currenty in-place.
-
Once the state Ends, the Input Buffer will close and any stored Input Handlers related to one saved Action will be invoked using the saved values from before.
Do not end the state at the last animation frame
Notifies and Notify States tend to fail being invoked when they are placed at the very last frame of an Animation, so it's recommended to place them a couple of frames before the end.
Opening and Closing the Buffer from Other Sources
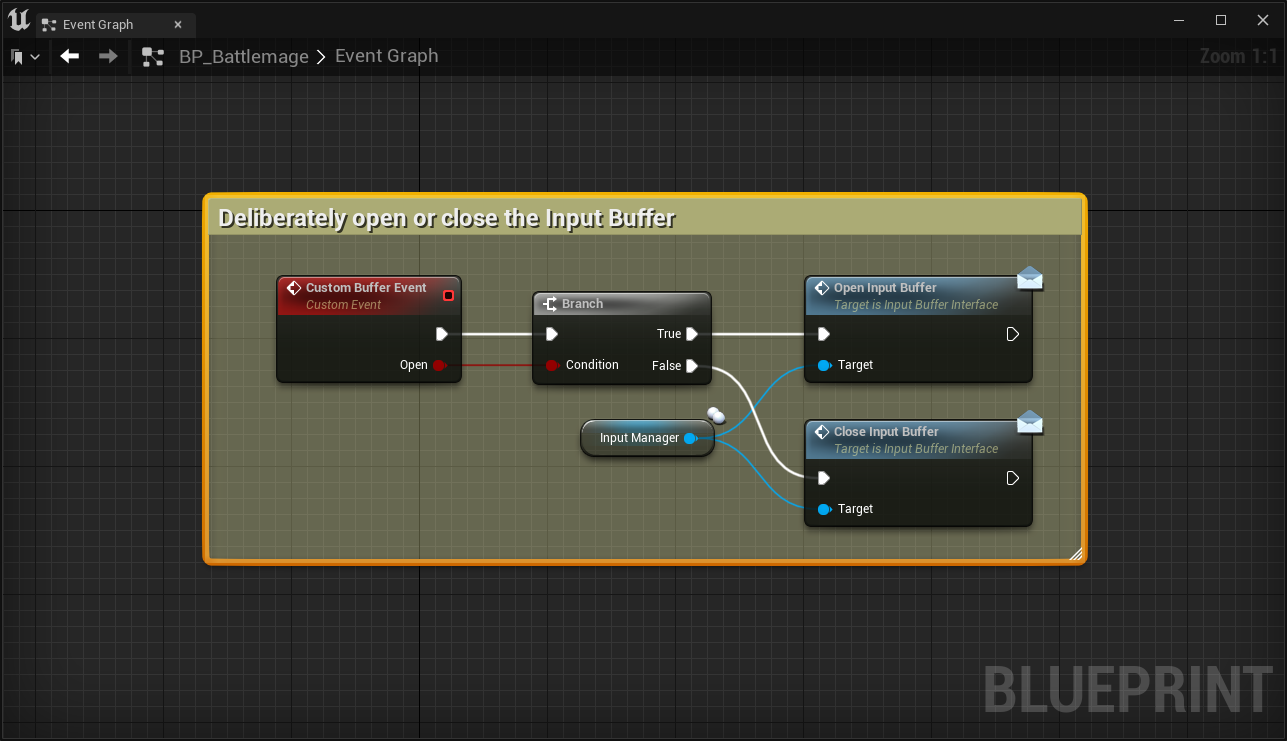
Even though the method above is the primary method to interact with the Buffer, you can open and
close the buffer in other ways, if you choose to do so. That can be done via the InputBufferInterface.

// ----------
// .h
public:

    UFUNCTION(BlueprintCallable, Category = "Custom Buffer Setup")
    void SetBufferState(bool bOpen);

// ----------
// .cpp
#include "NinjaInputManagerComponent.h"
#include "Interfaces/InputBufferInterface.h"

void AMyCustomCharacter::SetBufferState(bool bOpen)
{
    if (bOpen)
    {
        IInputBufferInterface::Execute_OpenInputBuffer(InputManagerComponent);
    }
    else
    {
        IInputBufferInterface::Execute_CloseInputBuffer(InputManagerComponent);
    }
}
Default Input Buffer Implementation
The UNinjaInputBufferComponent is the default implementation of the InputBufferInterface
and it also provides an additional useful feature that can be modified as necessary: the
Buffering Policy.
There are three possible values for it:
-
Last Command: All Input Actions will be processed until the buffer is closed. When that happens, the last Action that was processed is the one that will be executed. This is the default mode.
-
First Command: Once the first valid Input Action is saved, no other Actions will be kept and this first Action that was processed is the one that will be executed.
-
Disabled: If you'd rather have your own buffer implementation, the you can disable the default buffer, by using this value.
Supporting policies in custom buffers
If you are implementing your own buffer and would like to support the same policies, feel free
to use the EInputBufferMode enumeration to access these values.
Creating new Input Buffers
You can create your own Input Buffer by creating an Actor Component that implements the InputBufferInterface.
If you decide to do so, make sure to disable the Input Manager Component's Buffer and mark your
component as enabled, through the adequate interface method.
Another option which makes this processer easier is to create your component as a subclass of the
base NinjaInputBufferComponent, which not only implements the appropriate interface, but also
provides some additional utility methods.
This approach also allows you to only implement functionality for the methods that are relevant
for your scenario, usually being the BufferInputCommands, which is responsible for deciding
if a command should be stored for later use or not.
The FBufferedInputCommand Struct
Commands stored in the buffer are represented by the FBufferedInputCommand struct.
The main Input Manager Component will create these instances when input handlers are routed
to the buffer, instead of being processed immediately. The reason why the BufferInputCommands
receives an array of commands is because the commands in that array were all triggered
by the same Action and Event, so they actually represent one player input.