Case Studies
Now that we have a general understanding of the Input Handlers, but before creating new ones, let's take a look at some case studies using some Handlers available out-of-the box.
Case Study: Move
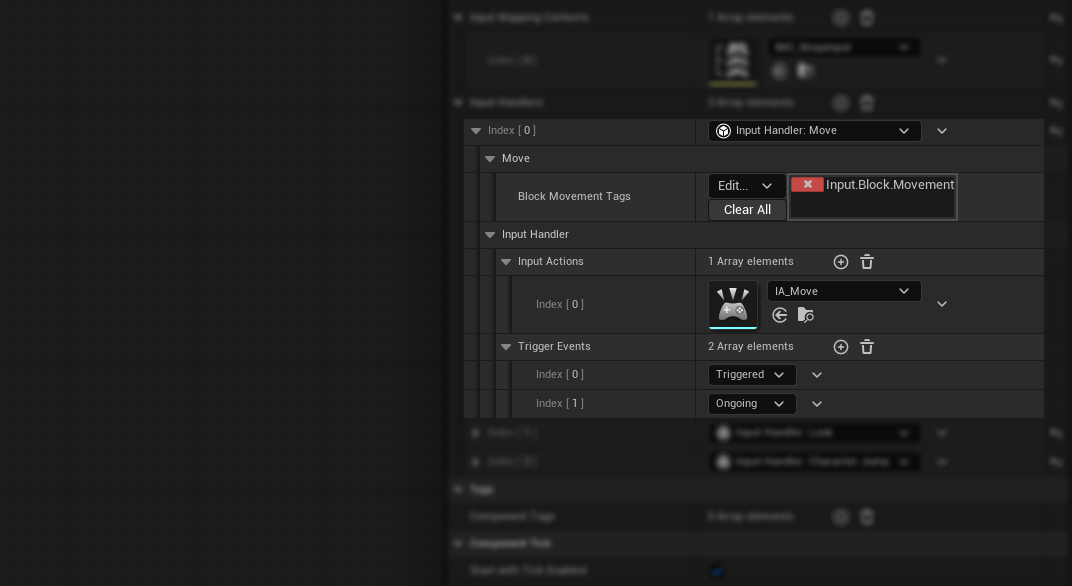
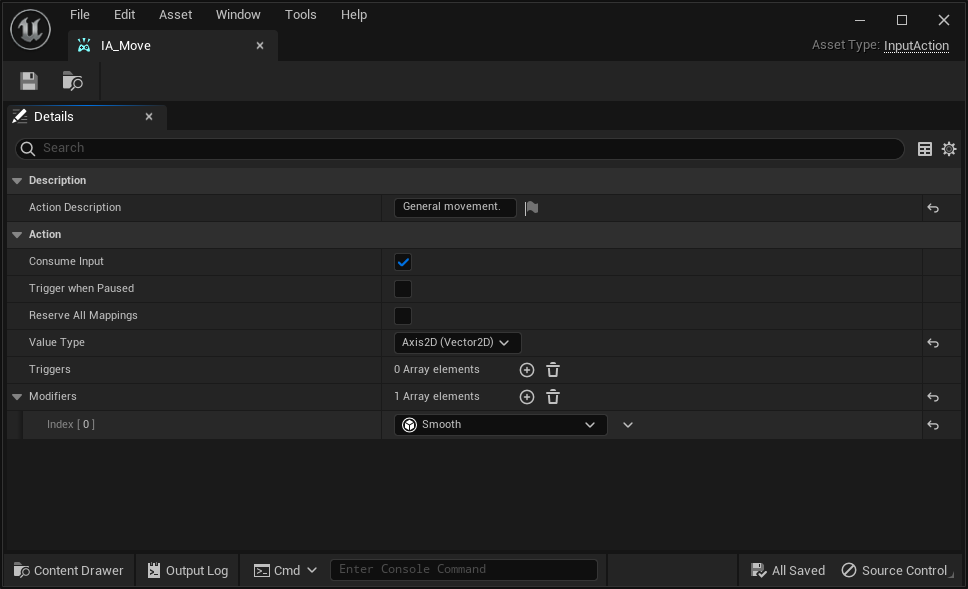
Let's take a look at the configuration for the Move handler is configured, and the IA_Move data asset itself.


Starting with the Data Asset we have a straightforward configuration of a 2D Axis input, with a Smooth modifier. There's no trigger set, meaning the trigger behavior will be the same as the Down trigger. This trigger has two events relevant to us: when it is effectivelly triggered and while the trigger is ongoing.
With that in mind, let's go back to the Input Handler and look into our setup. There are two categories for this handler: "Input Handler" containing common parameters, and Move containing specific parameters. Let's start with the former.
Handler Categories
Every handler will have the Input Handler category.
-
Input Actions: Denotes all Input Actions that can be handled. This Handler is specialized for movement, therefore the appropriate Action is already set for you. You can have multiple Actions assigned, though.
-
Trigger Events: Trigger events that we want to react to. As stated above, the Move Input Action will broadcast triggered and ongoing events so we want to catch those.
Watching Triggers
We can only capture events that are tracked by the Manager Component.
As for the specific parameters, we only have one:
- Block Movement Tags: If the actor that owns the component has an
UAbilitySystemComponentand this component has any of the tags provided here, then movement will be blocked. Keep in mind that you can customize this Tag globally (via Settings) or locally, for this particular instance.
For more information about this Handler, please check the Move Handler.
Case Study: Jump
For a different case, let's do the same evaluation provess for the Jump handler.


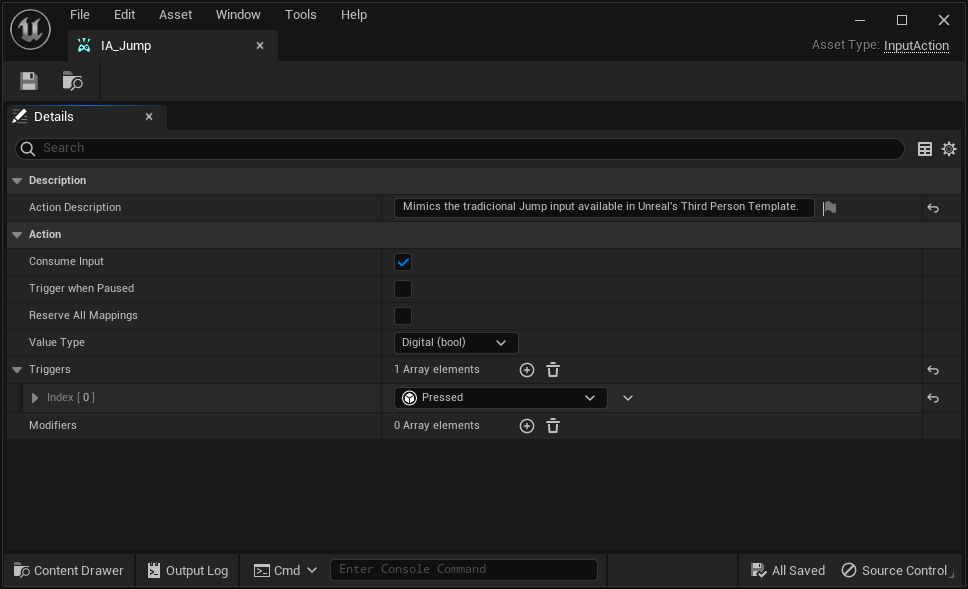
Once again, starting with the Data Asset, we have a Boolean input, without any modifiers and with a Pressed trigger, meaning the input will be triggered only once and then it will be completed.
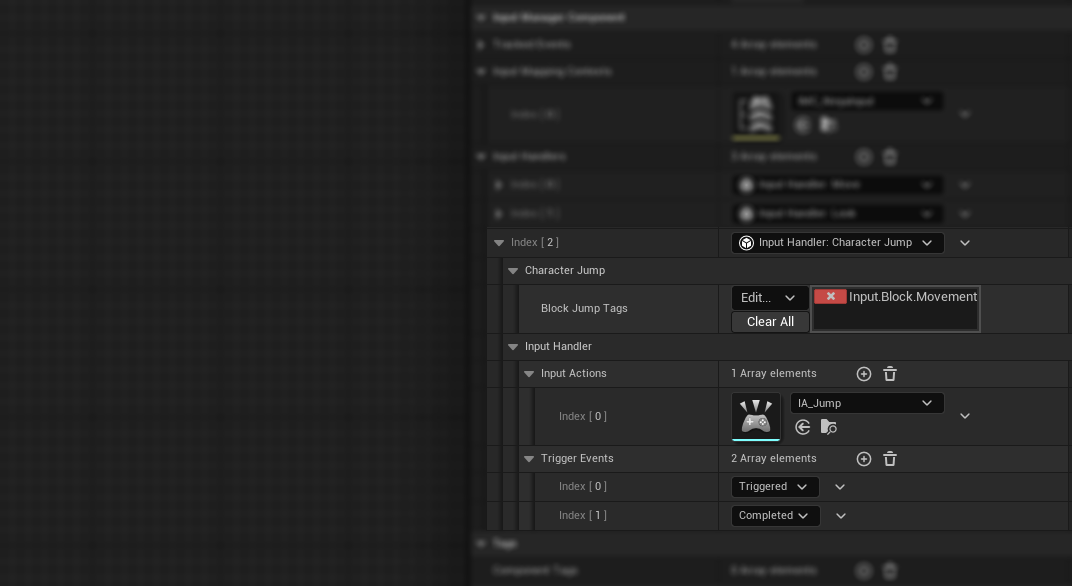
Now, looking into the Handler configuration, we have the following properties, organized between the "Input Handler" category and now, a specific "Jump" category:
-
Input Actions: As before, these are the Input Actions we want to react to. In this case, we have the Jump action already set.
-
Trigger Events: In this case, we want to react to the triggered event, that will make a character jump, and also the completed event that will stop jumping. This behaviour reflects the
ACharacterimplemntation. -
Block Jump Tags: Similar to the previous case, we can add Gameplay Tags that, if present in the owner's Ability System Component, will block the execution.
For more information about this Handler, please check the Jump Handler.
Next Steps
Now that we have a better understanding of how Input Handlers react to their respective Actions and Triggers, we are ready to implement a custom Handler.