Creating Input Handlers
Preparing the Input Action and Mapping Context
First, let's create two Input Actions: IA_PrimaryAction with a Pressed trigger, andIA_SecondaryAction
with Pressed and Released triggers.
Then, either create or reuse a preferred Input Mapping Context to add both actions to it, mapping them to any keys that you'd like. In this example, we're using the left and right mouse buttons and also the right gamepad shoulder and trigger.
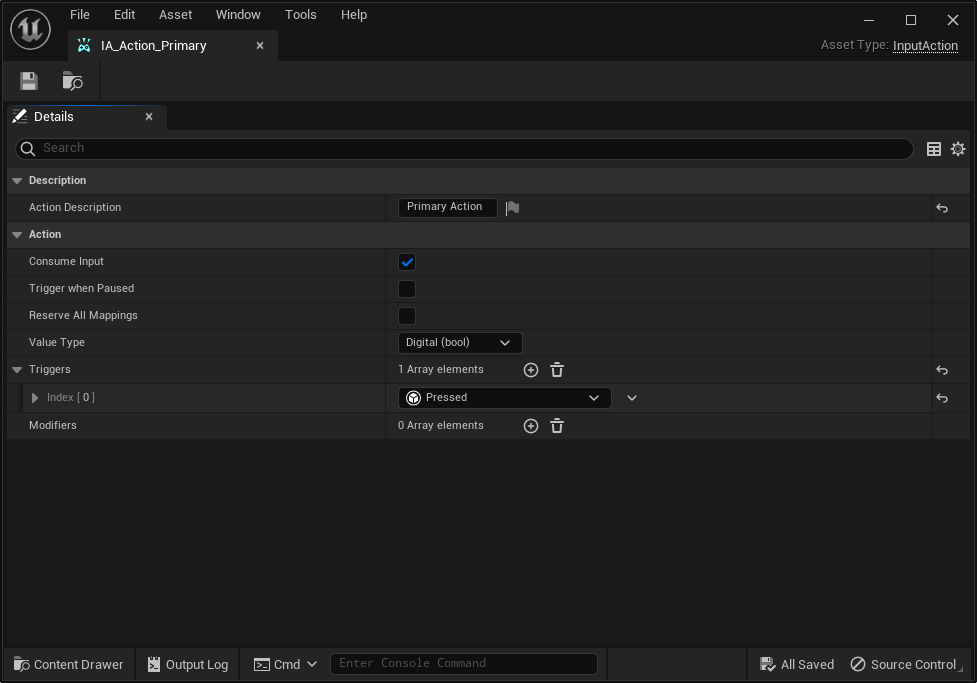
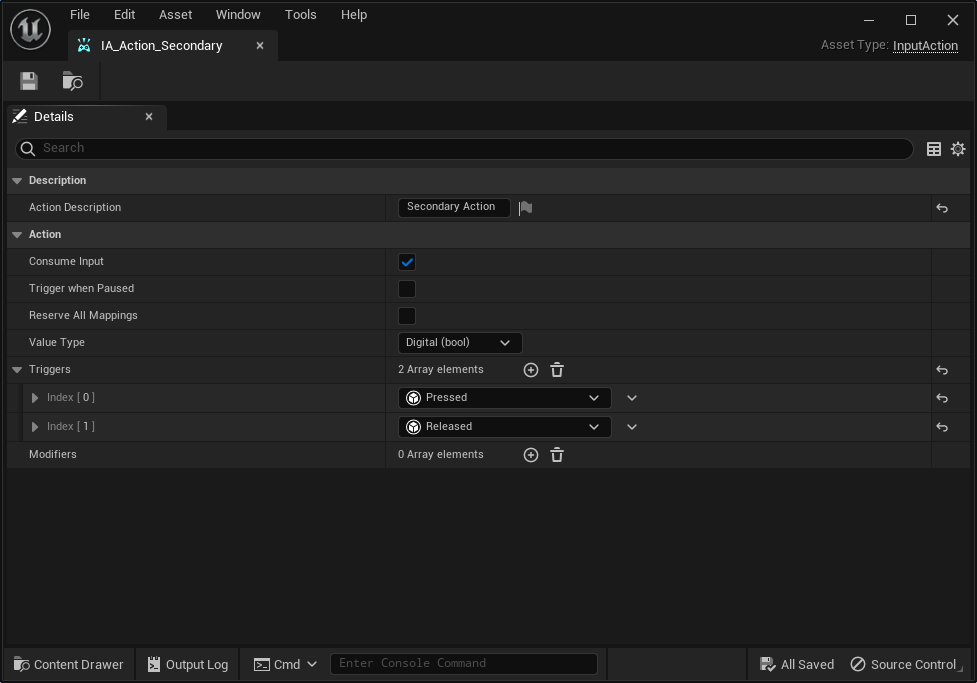
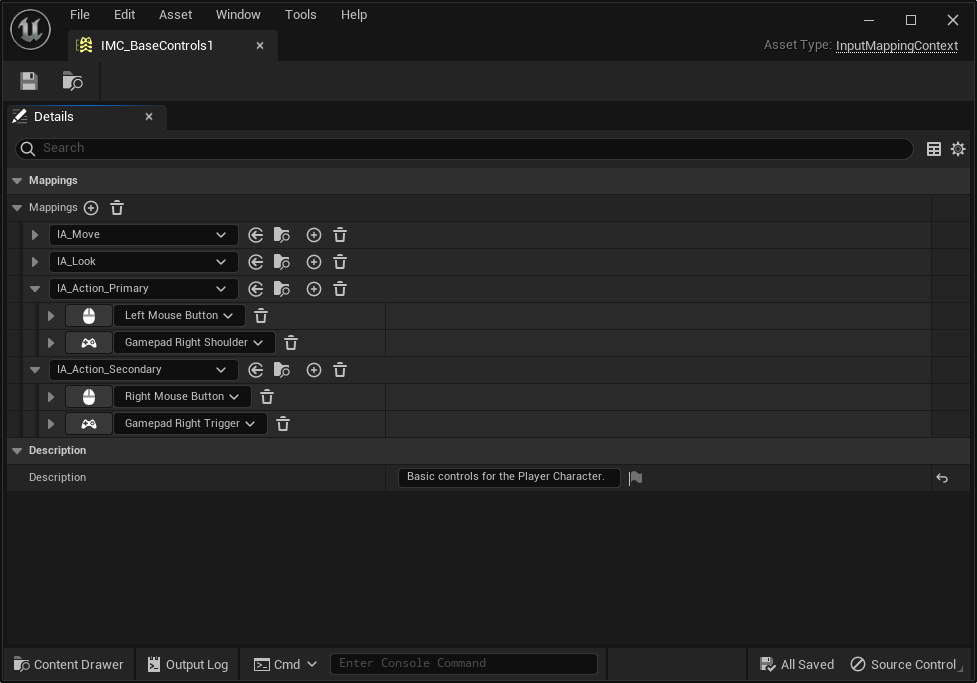
Use the Ninja Input assets as a starting point
The Ninja Input plugin has a few assets in its Content Folder that you can use as a starting point, including Input Actions, Mapping Contexts and Input Setups!
Always choose the right triggers
Always use the correct triggers for your Input Actions! Leaving it blank wiil default to the Down trigger, which is not an ideal choice for actions that should trigger only once.
Creating an Input Handler Blueprint
For the Primary Action, we'll create a Blueprint Handler, which can be done from the Editor, under the Input category, as shown below.
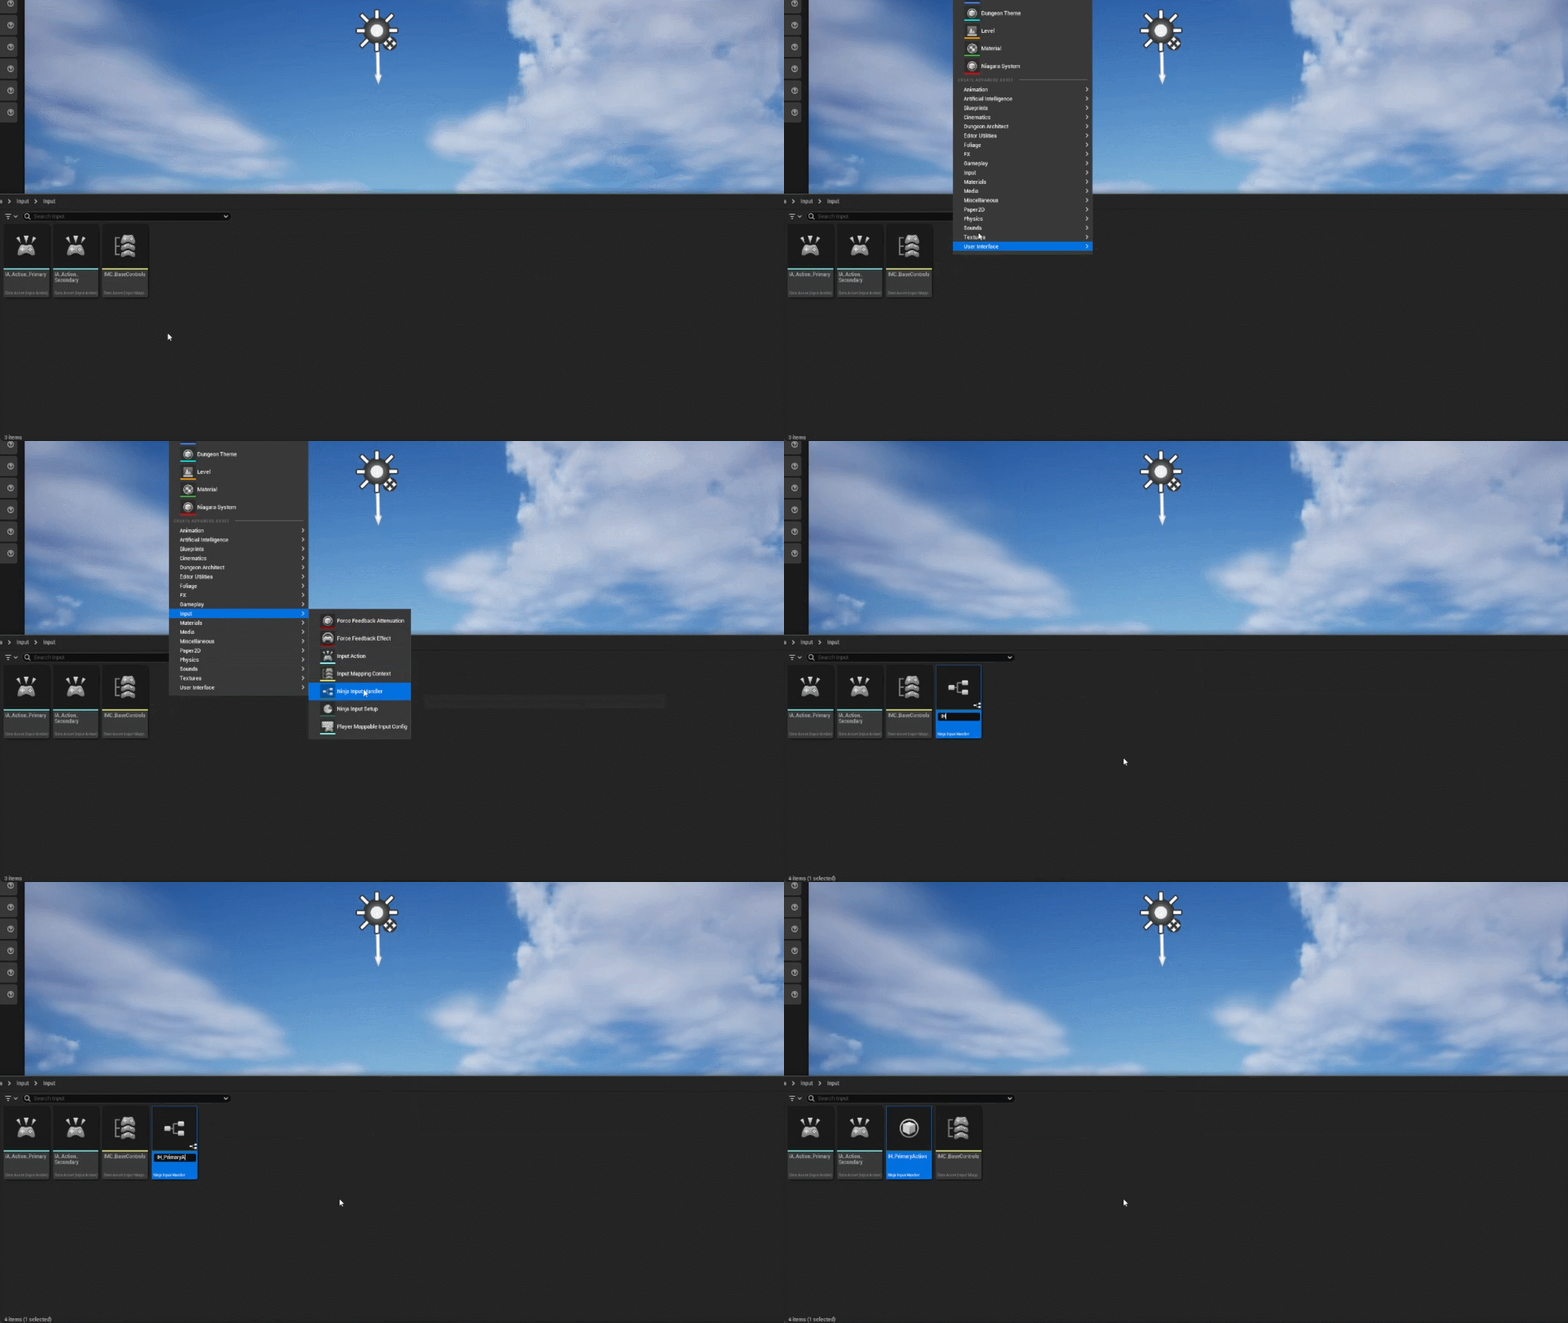
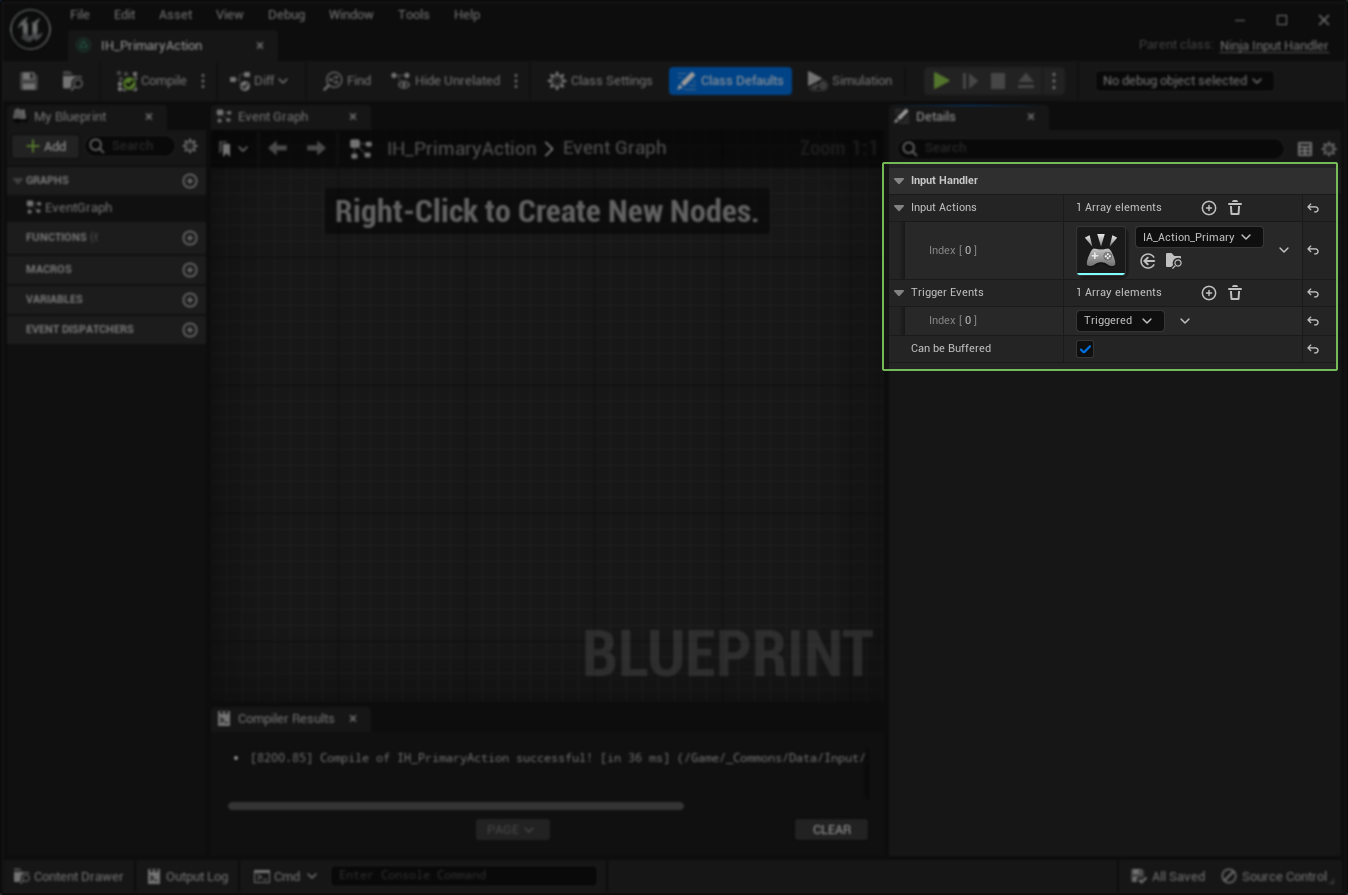
Open the blueprint and navigate to the Class Defaults pannel. Since we are creating this handler for the Input Action, we can assign it to it right away. We can do the same for the Trigger Events, since we are interested in watching the Triggered one.
This will tell the Input Manager Component that this Handler is compatible with this Action and Trigger.
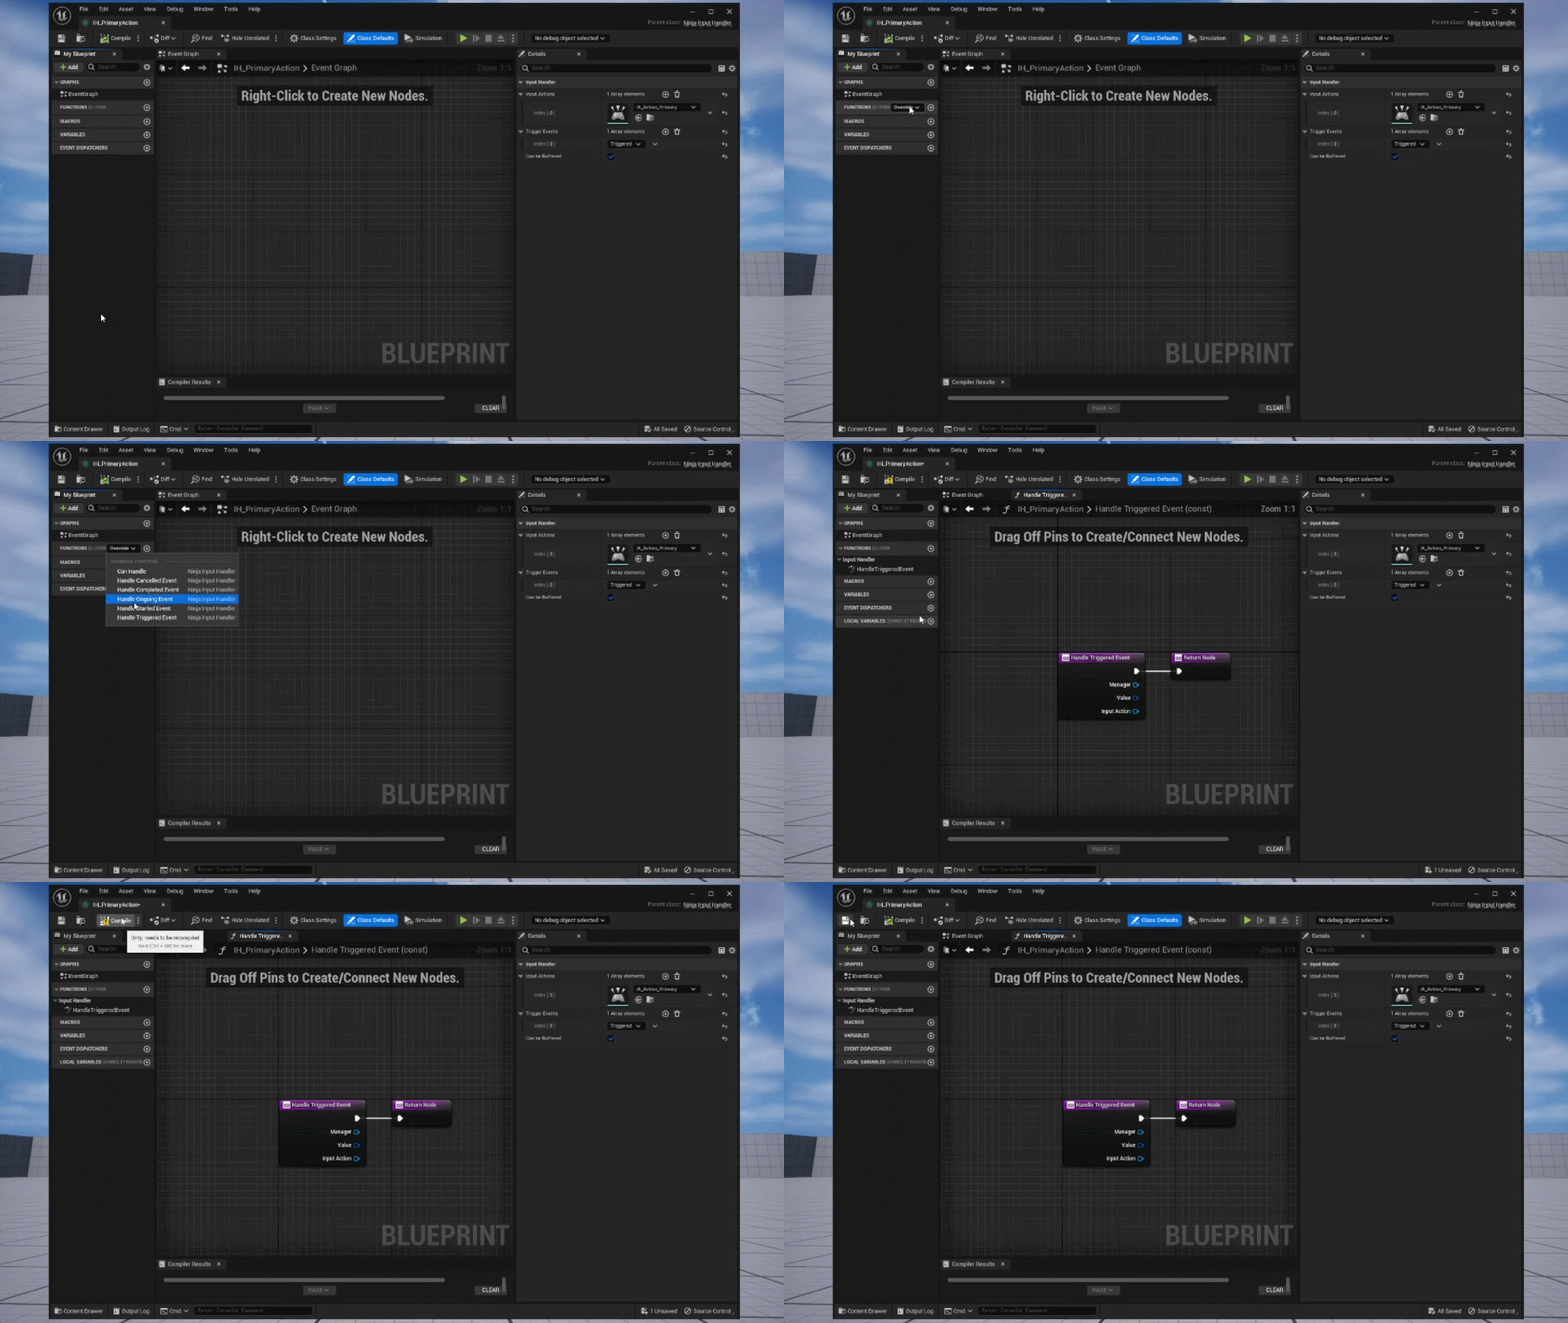
As per our Input Action Setup, we are interested in reating to the pressed key, so we need to implement the function that is related to that event.
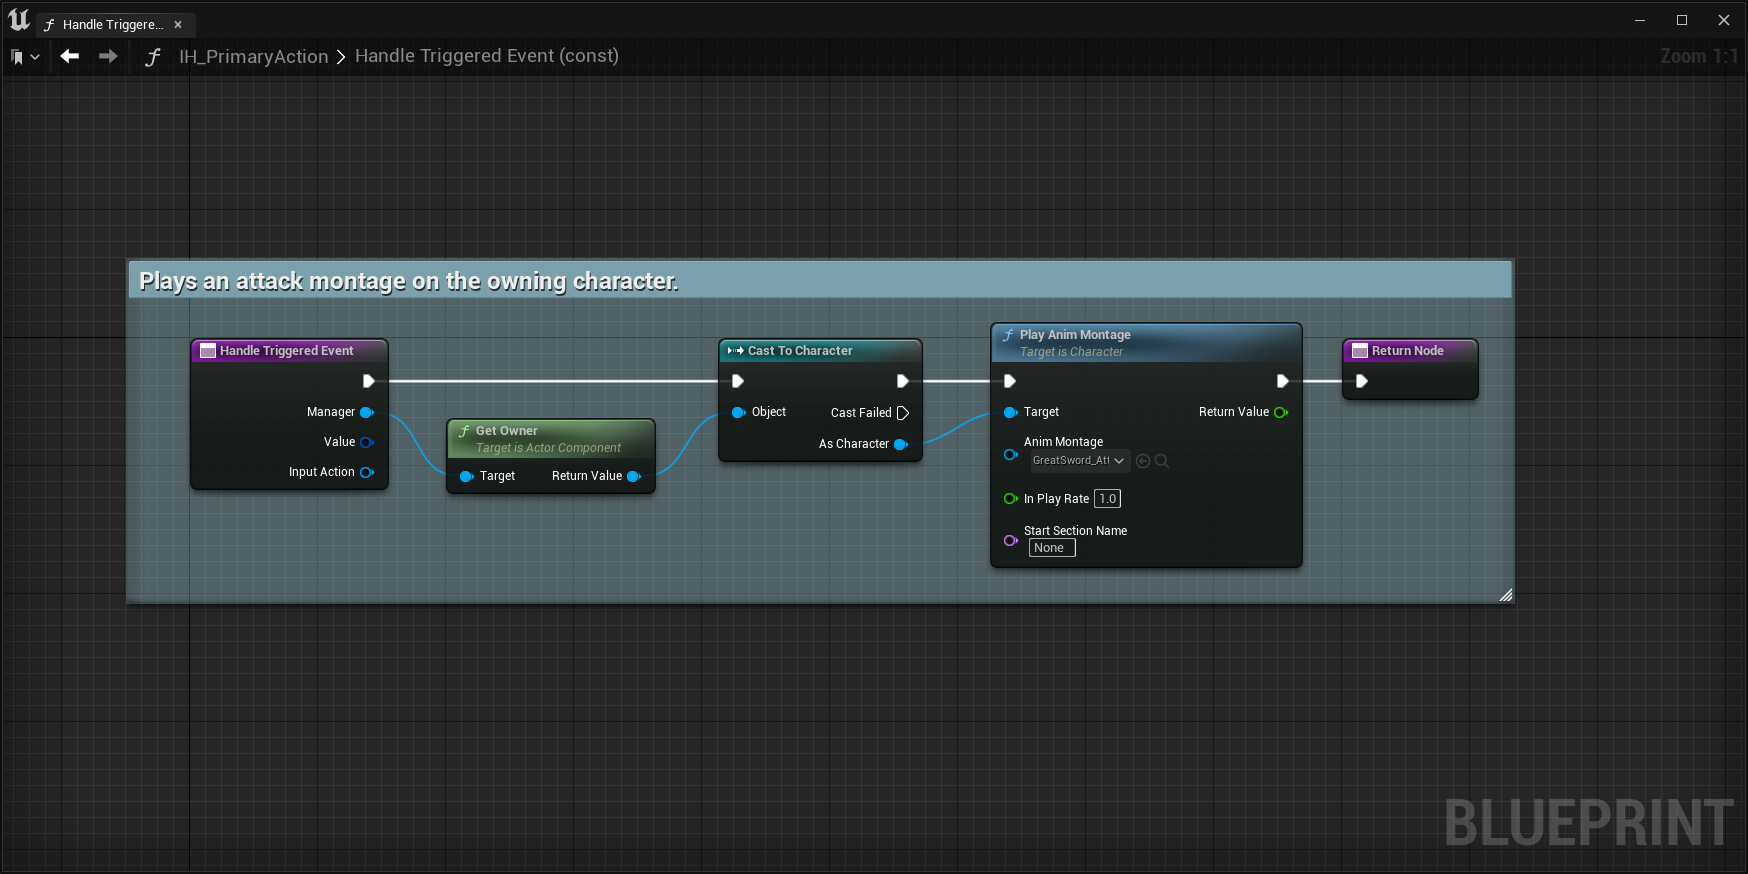
And now we can implement our function and in this example, we'll play an Animation Montage in the Character. In here, notice a few things:
- The Function is running in a const context, meaning you cannot modify the Handler's state.
- You have access to the Owning Pawn/Character/Controller through the Manager Component provided as a parameter.
- You also have access to the Value and the Input Action that triggered this Handler Event.
Defining a friendly name in Blueprints
If you'd like to have a friendly Display Name for your Input Handler, which will make it easier to find it in the Input Handler List, then make sure to set that name in the Class Settings pannel, in the Blueprint Display Name field.
Creating an Input Handler in C++
For the Secondary Action, we'll create a Subclass of UNinjaInputHandler in C++, so make sure to extend
from the it, when you are creating a new C++ class in the Editor or your IDE of choice.
Similar to the Blueprint version, we can define the Input Action and Triggers in the Constructor.
Getting the right asset reference
You can obtain the value for the FObjectFinder by right-clicking the Input Action in the Editor and then selecting Copy Reference.
Implement the constructor as follows:
#pragma once
#include "NinjaInputHandler.h"
#include "UInputHandler_SecondaryAction.generated.h"

UCLASS(meta = (DisplayName = "Sample: Secondary Action"))
class UInputHandler_SecondaryAction : public UNinjaInputHandler
{
    GENERATED_BODY()

public:

    UInputHandler_SecondaryAction();

}
#include "InputHandler_SecondaryAction.h"

#include "InputAction.h"
#include "Runtime/CoreUObject/Public/UObject/ConstructorHelpers.h"

UInputHandler_SecondaryAction::UInputHandler_SecondaryAction()
{
    // Setting the default trigger event.
    TriggerEvents.Add(ETriggerEvent::Triggered);

    // Loading the input action using the asset reference.
    static ConstructorHelpers::FObjectFinder<UInputAction> InputActionRef(TEXT("/Script/EnhancedInput.InputAction'/Game/Input/IA_SecondaryAction.IA_SecondaryAction'"));
    if (InputActionRef.Succeeded())
    {
        const TObjectPtr<UInputAction> InputAction = InputActionRef.Object;
        InputActions.AddUnique(InputAction);
    }
}
As for the implementation of our functions, we are tracking the trigger events for Pressed and Released, which is something that could be used for a "Channeled Spell" or "Blocking", "Aiming" or "Crouching" for example.
class UInputHandler_SecondaryAction : public UNinjaInputHandler
{

    // ...

protected:

    virtual void HandleTriggeredEvent_Implementation(
        UNinjaInputManagerComponent* Manager,
        const FInputActionValue& Value,
        const UInputAction* InputAction) const override;

}
#include "NinjaInputComponent.h"
#include "GameFramework/Character.h"

void UInputHandler_SecondaryAction::HandleTriggeredEvent_Implementation(
    UNinjaInputManagerComponent* Manager,
    const FInputActionValue& Value,
    const UInputAction* InputAction) const
{
    ACharacter* OwningCharacter = Cast<ACharacter>(Manager->GetPawn());
    if (IsValid(OwningCharacter))
    {
        if (OwningCharacter->bIsCrouched)
        {
            OwningCharacter->UnCrouch();
        }
        else
        {
            OwningCharacter->Crouch();
        }
    }
}
No need to re-implement crouching
The code above is just an example, the main point is to demonstrate how to create handlers in both C++ and Blueprints, but they are not "game-ready" and you already have a Crouch Handler available!
Defining a friendly name
If you'd like to have a friendly Display Name for your Input Handler, which will make it easier to find it
in the Input Handler List, in C++ make sure to set that name in the DisplayName value, in the UCLASS macro.
In Blueprints, go to the Class Settings Pannel and set that name in the Blueprint Display Name property.
Configuring the Data Asset
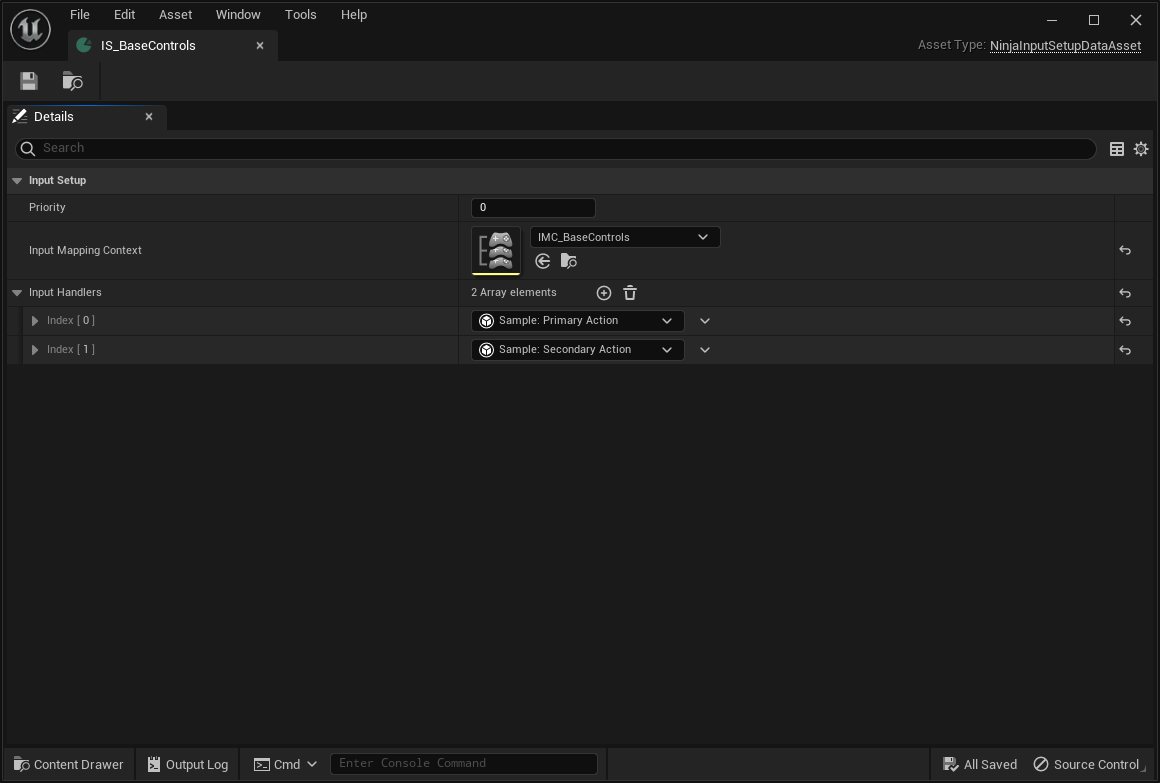
The last step is to create a new Input Setup and assign it to the Character's Input Component. All these steps were already covered in the Initial Setup page. But this is how the Data Asset should look like, with the Mapping Context and Handlers.
You created your first Input Handlers
This should give you an idea of how the process of creating Handlers works, both in Blueprints and C++. However, before creating your own Handlers, make sure to check the vast collection of Handlers already available and maybe they can already fulfill your requirements, or at least serve as a base Class!
Final Thoughts
Creating Input Handlers is quite straightforward!
As mentioned above, make sure to explore the provided library of Handlers to get familiarized with what's available, before deciding on create new Handlers from scratch!
Here are some important things to keep in mind, while creating your handlers.
Retrieving a World Reference
Since Input Handlers are usually created by a Data Object, they don't have a direct reference to the UWorld
instance. This means that, if you need to access it, then do so via the Input Manager instance, which
is always provided to the handler function.
Handlers Run in an Immutable Context
All functions that can be implemented in Handlers are executing in an immutable context, meaning the Handler object cannot be modified. This happens because the same Handler instance can be executed for multiple actions and multiple characters, even!
So if you need to persist state, do so in your owning Pawn/Controller. Furthermore, it's highly recommended to retrieve or save such values using an Interface as that removes the Cast requirements and memory allocation from doing so.
Use the Correct Input Triggers
This can't be stressed enough: Make sure to use the correct triggers for your Input Actions! If you don't set
any triggers, they will automatically execute the Down trigger which is less than ideal for common scenarios such
as one-off ability triggers, UI events and so on.
Here's a table with some suggestions of the appropriate setups for some common scenarios:
| Scenario | Implementation |
|---|---|
| Continuous Movement | Down will trigger an ongoing event, while the button is down. |
| Common Actions | Pressed will trigger once, when the key is pressed. |
| Press for x seconds to Interact | Hold, if configured to trigger once, that will happen after pressing a button for x seconds. |
| Interaction start/cancel | In addition to the above, create another Action for the same button that tracks the Pressed and Released events. |
| Momentary Crouch, Spring, Aim, Block, etc. | A combination of Pressed and Released which will trigger on both events. If you want to "toggle instead, then just Pressed is enough. |
| Shift or Ctrl + Some Key | Chorded Action, where the modifier keys (Shift, Ctrl, etc) are registered as their own Input Actions, mapped and added to this trigger. |
Add or Remove Contexts as necessary
If your character has many input contexts such as default movement, riding a horse, inventory UI and so on, consider having separated Contexts for each one of those scenarios, with their proper dedicated Handlers, and then add/remove these contexts as necessary, using the proper methods shown in the Input Manager Component page.
Enable Logging Messages
While creating new Handlers or new Setups, consider enabling the global debug, in the Ninja Input Settings page. This is a quick way to make sure that all handlers are being correctly triggered, even when they are not performing the expected action.
Also, keep in mind that if you enable the Log Level to Verbose, a lot of information will be added to your
console, which can immensely help with debugging issues. You can do that in the DefaultEngine.ini file, by
adding the following lines:
[Core.Log]
LogNinjaInputHandler=Verbose
LogNinjaManagerComponent=Verbose